
Hand-sewing a skirt
I only very recently picked up a needle and thread with the aim of actually sewing something. My mother always encouraged me to fix my hems if they came undone and learn how to patch holes, but needless to say, the most I did before now was sew on some buttons. Teenage-me was just not interested.
But, that has now changed!
Why am I hand-sewing?
The main reason for my sudden interest in the sewing craft centers around the idea of “fast fashion” or, more accurately, trying to contribute to it less. When I was younger, I bought a lot of clothes. The clothes, however, didn’t last very long - the seams came undone quickly and the material wore easily. Because I didn’t know how to fix them, nor did I even seriously consider doing so anyway, I made some great excuses to throw a lot of them out and buy new clothes. I finally began to see that there was an unhealthy problem here - for many reasons, but probably initially due to lack of money - and stopped buying so much.
Of course, most ”fast fashion“ is relatively cheap and arguably, there are benefits to having affordable clothing. But, I’d like to think affordability doesn’t have to come at the cost of quality (or the underpaid worker). The production of these clothes (and many other products) doesn’t seem to be built upon the concept of quality to ensure the item lasts as long as possible. At least, buying new items seems to be encouraged rather than the skill of repairing or buying second-hand. This “fast fashion” (buying new clothes often and throwing out others instead of mending/recycling them) gives rise to problems, potentially with long-term implications, that should be considered. This is where I start to think about how our natural systems are involved. Everything we do is connected to the world around us. Everyone affects and is affected by our complex natural world.
To get a more complete understanding of the implications of the fast fashion industry, we would have to consider its whole lifecycle (or lifeline) which includes fibre production, fabric and yarn preparation, dying and finishing, sewing, packaging, transport and then disposal (if not recycling/reusing). These individual steps in the process often don’t occur in the same country but are spread across the globe, increasing transport necessary to make each item. One can imagine the energy and resources each step needs, and waste and pollution it produces, would become even larger when huge centrally owned companies pump products out regularly for quick consumption. When these clothes start to wear or when they become “out of fashion” they’re quickly thrown out, wasting all the energy and life that went into creating them. A study,1 that overviewed ways to recover saccharides (sugars) from the natural fibres in clothing waste, stated that wastewater and fibre waste are the major wastes created from textile production, and fibre waste is mainly created from unwanted clothes in the supply chain. And according to the US Environmental Protection Agency report done for 2018, only 15% of textile waste was recycled, the rest went to landfill or was combusted for energy recovery.2 These fast fashion practices not only come at the detriment of our valuable global ecosystems but also to those who work for fast fashion companies and communities with smaller, local textile businesses.
So, what do we do? Well, I don’t have any easy answers for issues concerning economies, the banking system, the loss of free markets, the need (in my opinion) for new currencies and the decentralisation of power structures and our need to value quality goods and services and community wellbeing over numbers on a screen - all of which I believe are interwoven into the “fast fashion” problem... However, one of the simplest things I know I can do, at the very least, is to choose to not buy so many new clothes and then learn how to fix the ones I own. I don’t think we can expect the companies to take the lead and I’m also skeptical that government intervention won’t become manipulated by corporations and money. I can at least practise awareness and make a personal change to begin with. It won’t fix a lot but it’s a start.
One of the best ways to learn to sew is probably by trying to make something oneself.
Many historical methods of sewing, I believe, can be adopted to improve the ”fast fashion“ situation and help our ecosystems thrive, people included - using natural fibres, using more locally acquired materials, making items stronger and more lasting, repairing... For this reason, as well as my interest in history, self-sufficiency, living more simply, and... my lack of sewing machine, I have chosen to handsew, as mentioned in the title. I want to attempt historical sewing techniques and clothing design in the future, but I will start with handsewing a cotton skirt.
I’m a beginner
Before we begin - a little disclaimer: I am no professional seamstress, I am learning as I go and my sewing vocabulary might be completely off! As a result, please don’t take this as a tutorial. There are mistakes that I have made and steps I could have done in a different order. There are probably professional tailors and seamstresses out there shaking their heads at things I don’t even know I’ve done! However, at the very least, I hope others can learn from my mistakes or maybe even become inspired to try and pick up the skill too. This skirt is only the second “thing” I have ever sewn together from scratch, the first being a mouse for my cat...

He looked at it once and never again...
Other than that, I had already been learning basic stitches and patching tears and holes in clothes that I own.
Fabric and thread
Ok, let’s get on with it! I purchased 100% cotten fabric for the skirt (the original was linen, which I really liked too). Either way, I wanted a natural fibre. My aim is to support local businesses and buy material that is locally made from natural materials. Unfortunately, the shop in my area didn’t supply locally made fabric, so I will have to do some research into this. I also purchased 100% cotton thread in the same colour as my fabric. The thread was actually so perfectly colour matched to the material I had trouble seeing my stitches at times! Regarding the fibre of the thread, I have read that some people don’t believe it is necessary to match your thread fibre with your fabric fibre. For example, some think cotton thread isn’t so strong and so prefer to use silk thread with cotton fabric. As I don’t know what I am doing, I will just see how my cotton thread holds up! I can’t imagine cotton thread not being strong enough in this case, especially since there won’t be a lot of force pulling at the skirt seams.
Before doing anything with the fabric, I hear one is supposed to wash the fabric if doing so will cause it to shrink or change its shape. Natural materials like cotton, wool, linen, silk and hemp can shrink when their fibres relax through absorbing moisture, heat exposure and mechanical action. I, however, did not wash my fabric, so again, I’ll see what happens. If I use cold water to wash the skirt, I might be able to avoid shrinkage.
Making a skirt pattern
Copying something that already exists, I thought, might be the easiest way to start, so I found one of my skirts to replicate. I didn’t really need to worry about sizing this way either. After having a good look at it, I found it to be made of various distinct shapes: a long trapezoidal shape used for the panels of the skirt (x12), the pocket shape (x4), the rectangle waistband (x1) and another smaller rectangle that was repeatedly sewn around the inside of bottom of the skirt (x6) (I later found out these smaller rectangles were not actually rectangles, but I’ll get to that later...).

I promise I ironed these before cutting and stitching them together... The khaki green wrinkly thing is the skirt I used to copy the pattern.
I traced these shapes onto some baking paper and cut them out. I think a lot of modern dress patterns include the seam allowance in the pattern shape, but I needed to add the seam allowance when tracing my pattern onto material. I feel this made it easier since I had a line where I needed to stitch. I also believe historical dress patterns were like this too, in that they did not include the seam allowance either and that part was up to the individual.
Cutting the fabric
I made sure the direction of the fabric was correct before tracing the patterns onto the actual skirt fabric with pencil (I started using chalk later on too). The ”warp“ of the fabric is the lengthwise woven threads. This direction resists stretching the most, which you will notice if you tug on the fabric in the direction of the warp. The ”weft“ is the direction of the threads perpendicular to the warp. The ”bias“ is at 45 degrees to the warp and weft and has the most stretch. For the skirt, I positioned the material so that the warp runs vertically down my skirt. This way gravity won’t cause the skirt to stretch and sag.
Pinning and stitching the panel pieces
After cutting out all my shapes, leaving a few centimetres around each one for the seam allowance, I started the sewing process by aligning, pinning and then stitching, with a back stitch, two of the long triangular panels together lengthways.
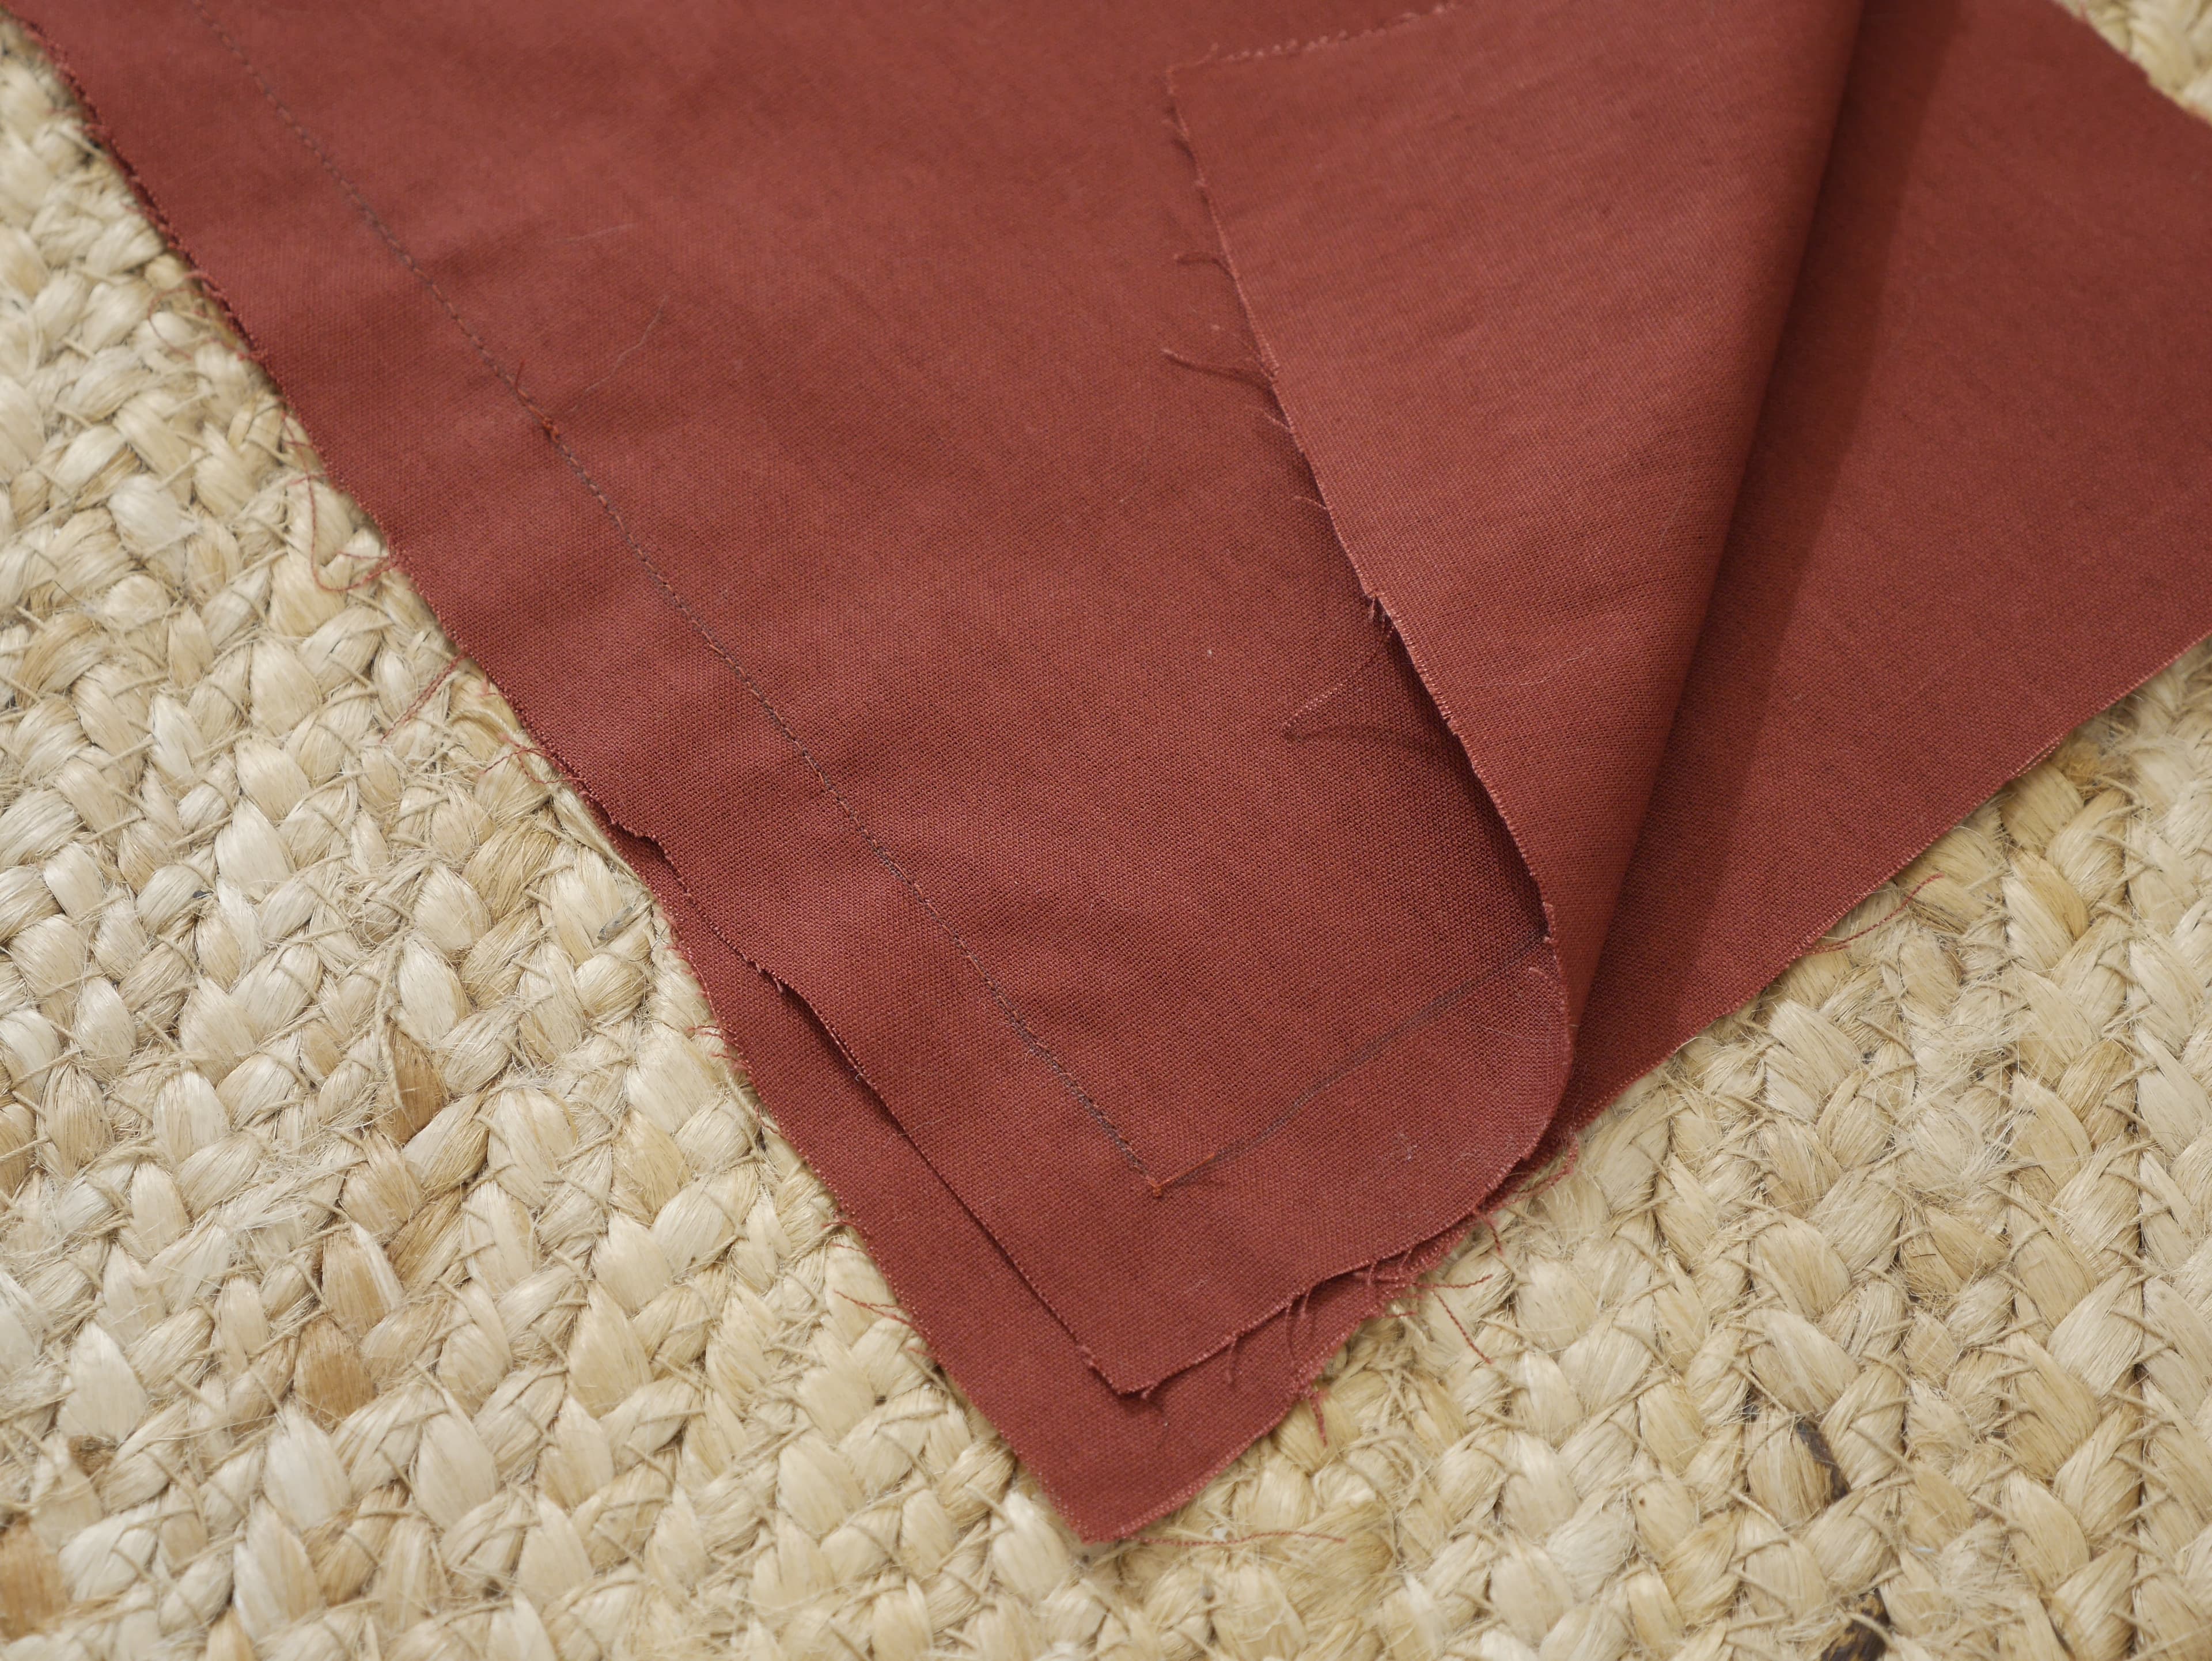
The upturned material is just to show it’s two panels on top of each other! I drew my patterns without seam allowances and then cut around those lines leaving roughly an inch/a few centimetres for the seam allowance... ignore my cutting skills.
This step was repeated to create 4 groups of 3 panels. This was done because inbetween these groups will be pockets, the back zip and a split in the front, which I dealt with next.

Because I don’t own an ironing board for some reason, I iron on the floor. The seam allowances of the two panels that I stitched together first were ironed flat and then the third panel was ironed.

The third panel in each group then got placed on top so its “right” side (outside) faced down towards the “right” side of the other panel that it got stitched to.

Here are the three panels backstitched together, right side facing down. This was repeated for the other panels, so that the 12 panels were in 4 groups of 3.
Pockets
Next, I started on sewing the pockets. I lay two sets of skirt panels so their “right” sides were facing upwards. Then, one half of a pocket was attached to one set of three panels and the other half was attached to the other set of three panels so that when the two sets of panels were side by side the pockets were adjacent to each other. If the pocket has a pattern on the inside, one would make sure the inside of the pocket (the pattern) is facing down towards the “right” side of the skirt panel. My material was all the same, so this didn’t matter for me. For this reason as well, it didn’t matter too much that I kept getting the pencil lines on the wrong side of my fabric pieces. I will have to figure this out properly for the future though.

The pocket halves were pinned into place on the side that lines up with the edge of the skirt.
Once the two pocket halves are backstitched onto the skirt where the pins are, I gave it another iron before aligning and stitching them together. Now, the part I nearly messed up... I flipped the two sets of panels so their “right” sides faced downwards and aligned them, not forgetting to turn the pocket halves out and press them flat. If the pockets aren’t turned out, one will end up pinning and sewing the skirt with the pocket coming out on the outside of the skirt(!).
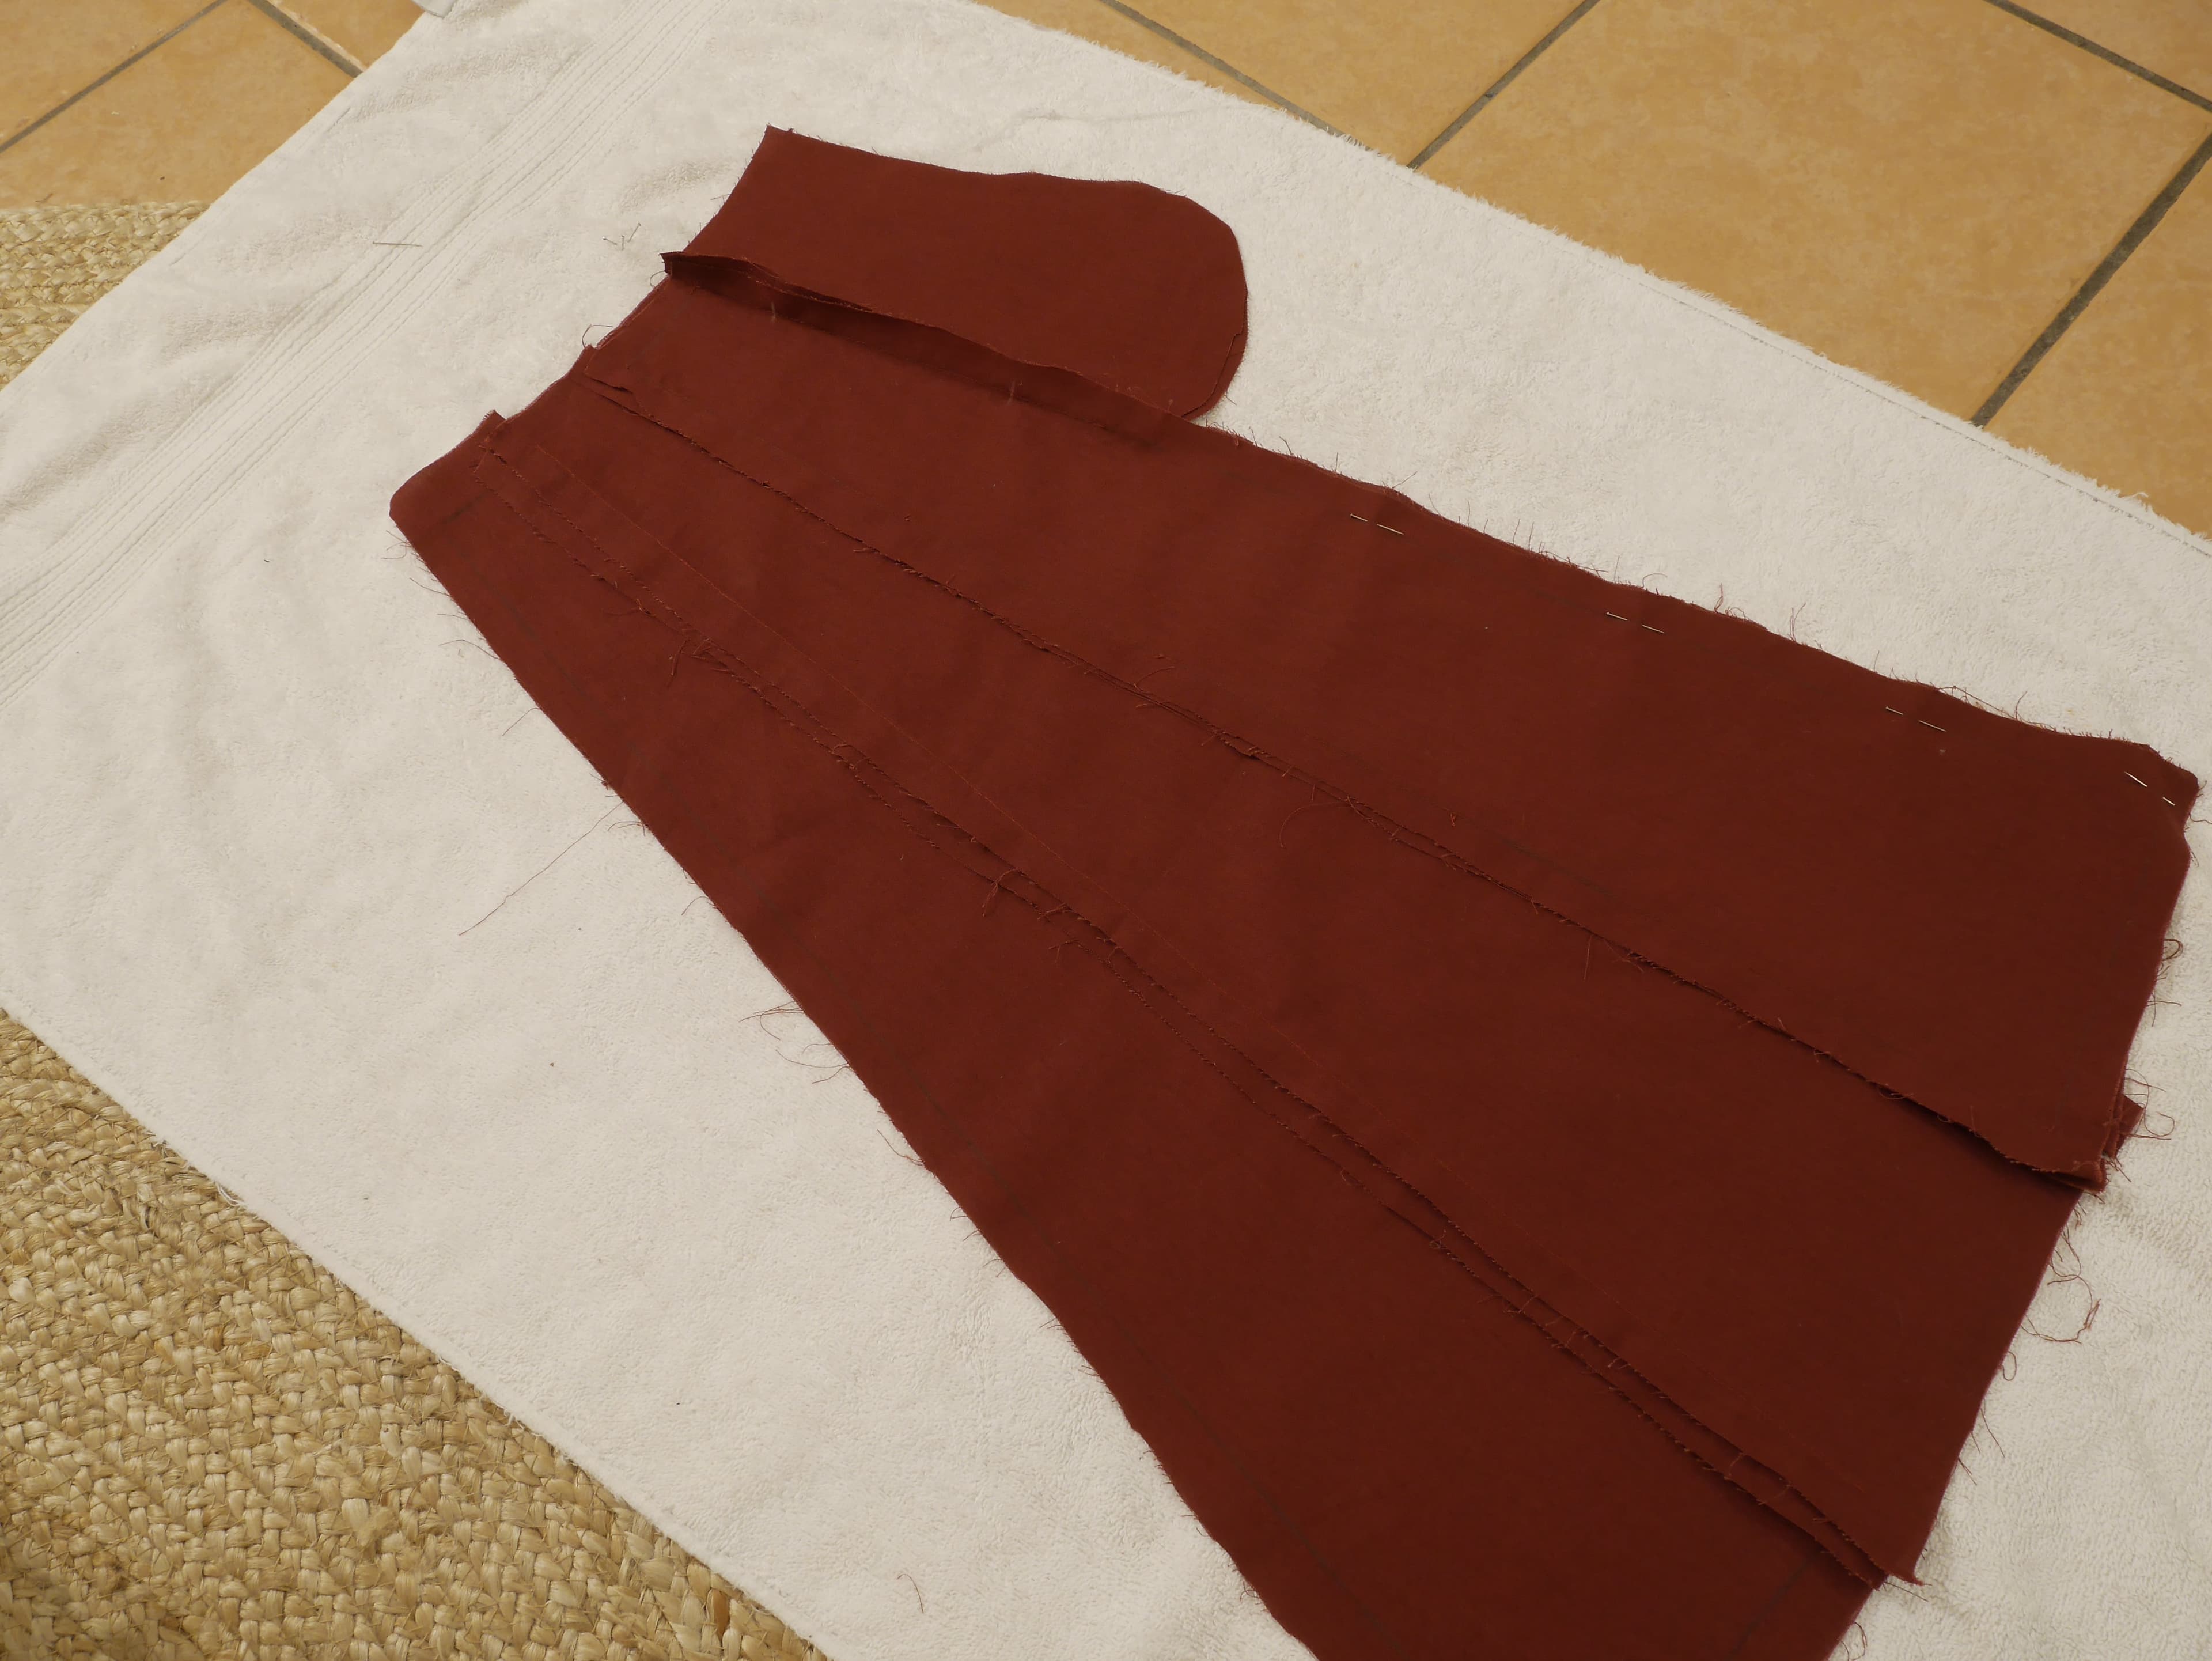
Panels, aligned on top of each other, with the pocket halves turned out.
The position of the pocket opening now needed to be marked. I used tailor’s chalk to mark a line 4.5cm from the top and then another line 13cm further down again. I checked to make sure my hand fit in the pocket opening by laying my hand between the chalk marks.
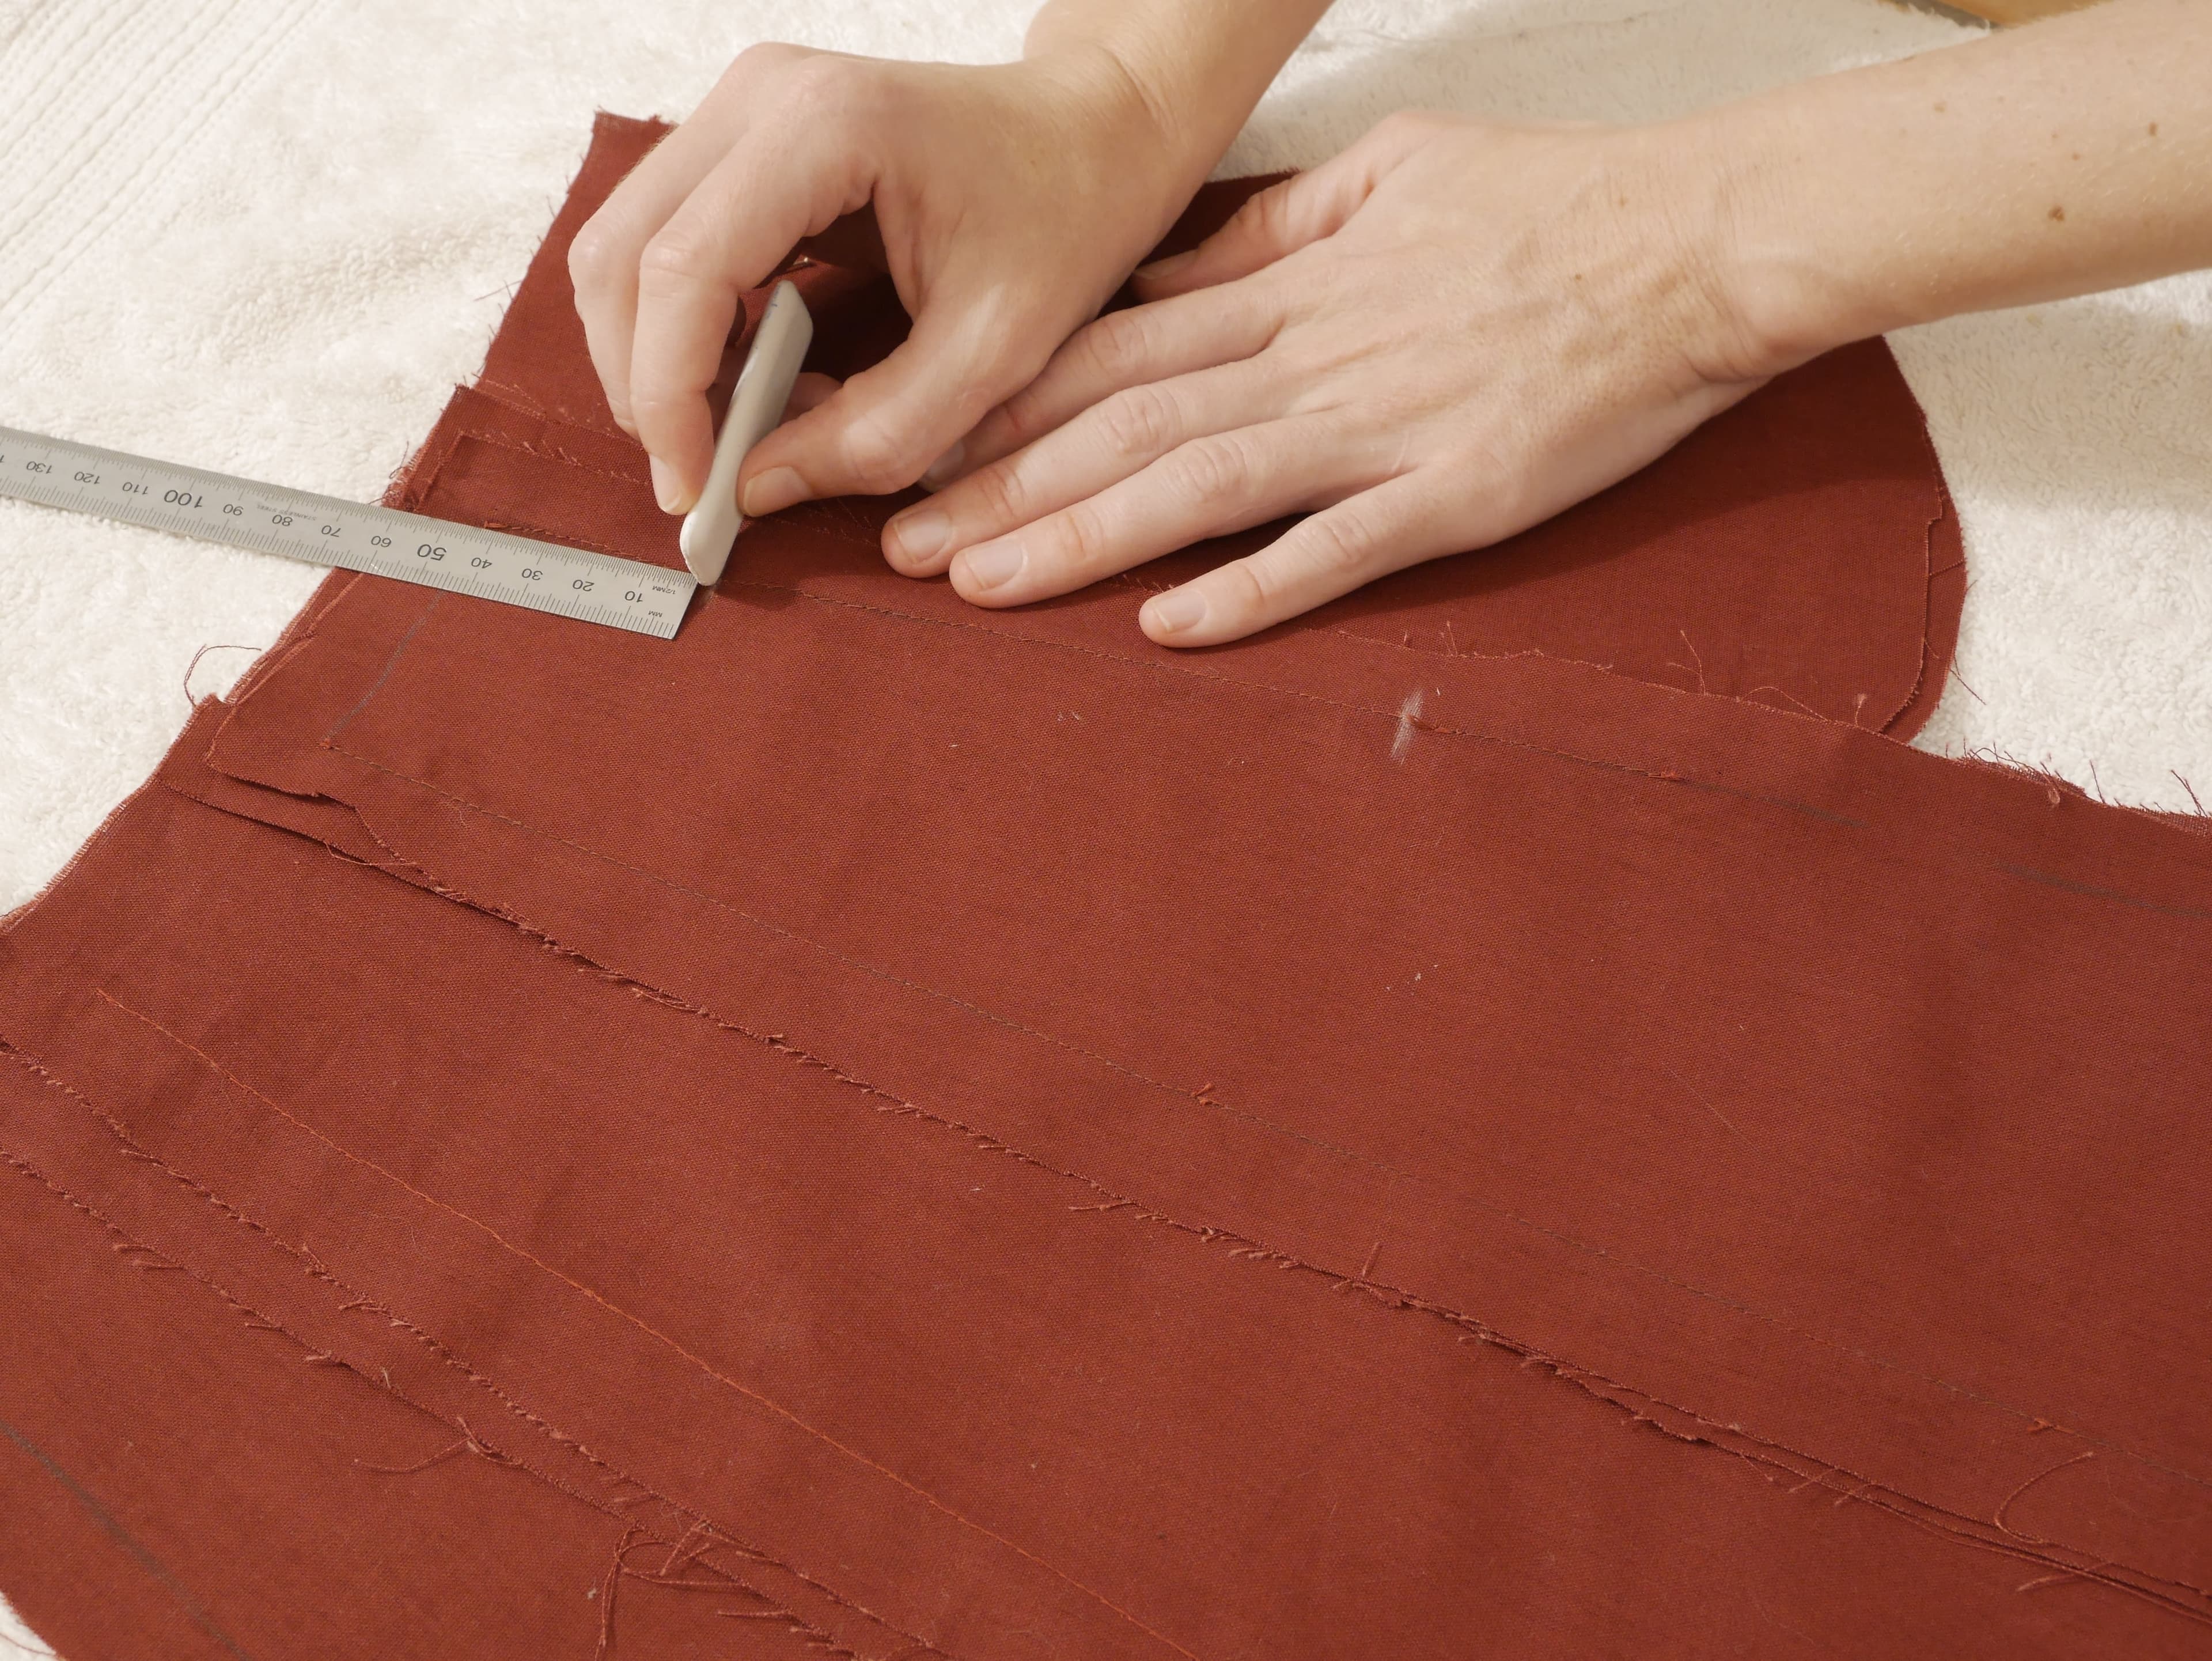
The skirt I was copying had its pocket starting 4.5cm from the bottom of the waistband. The actual pocket opening was 13cm long.
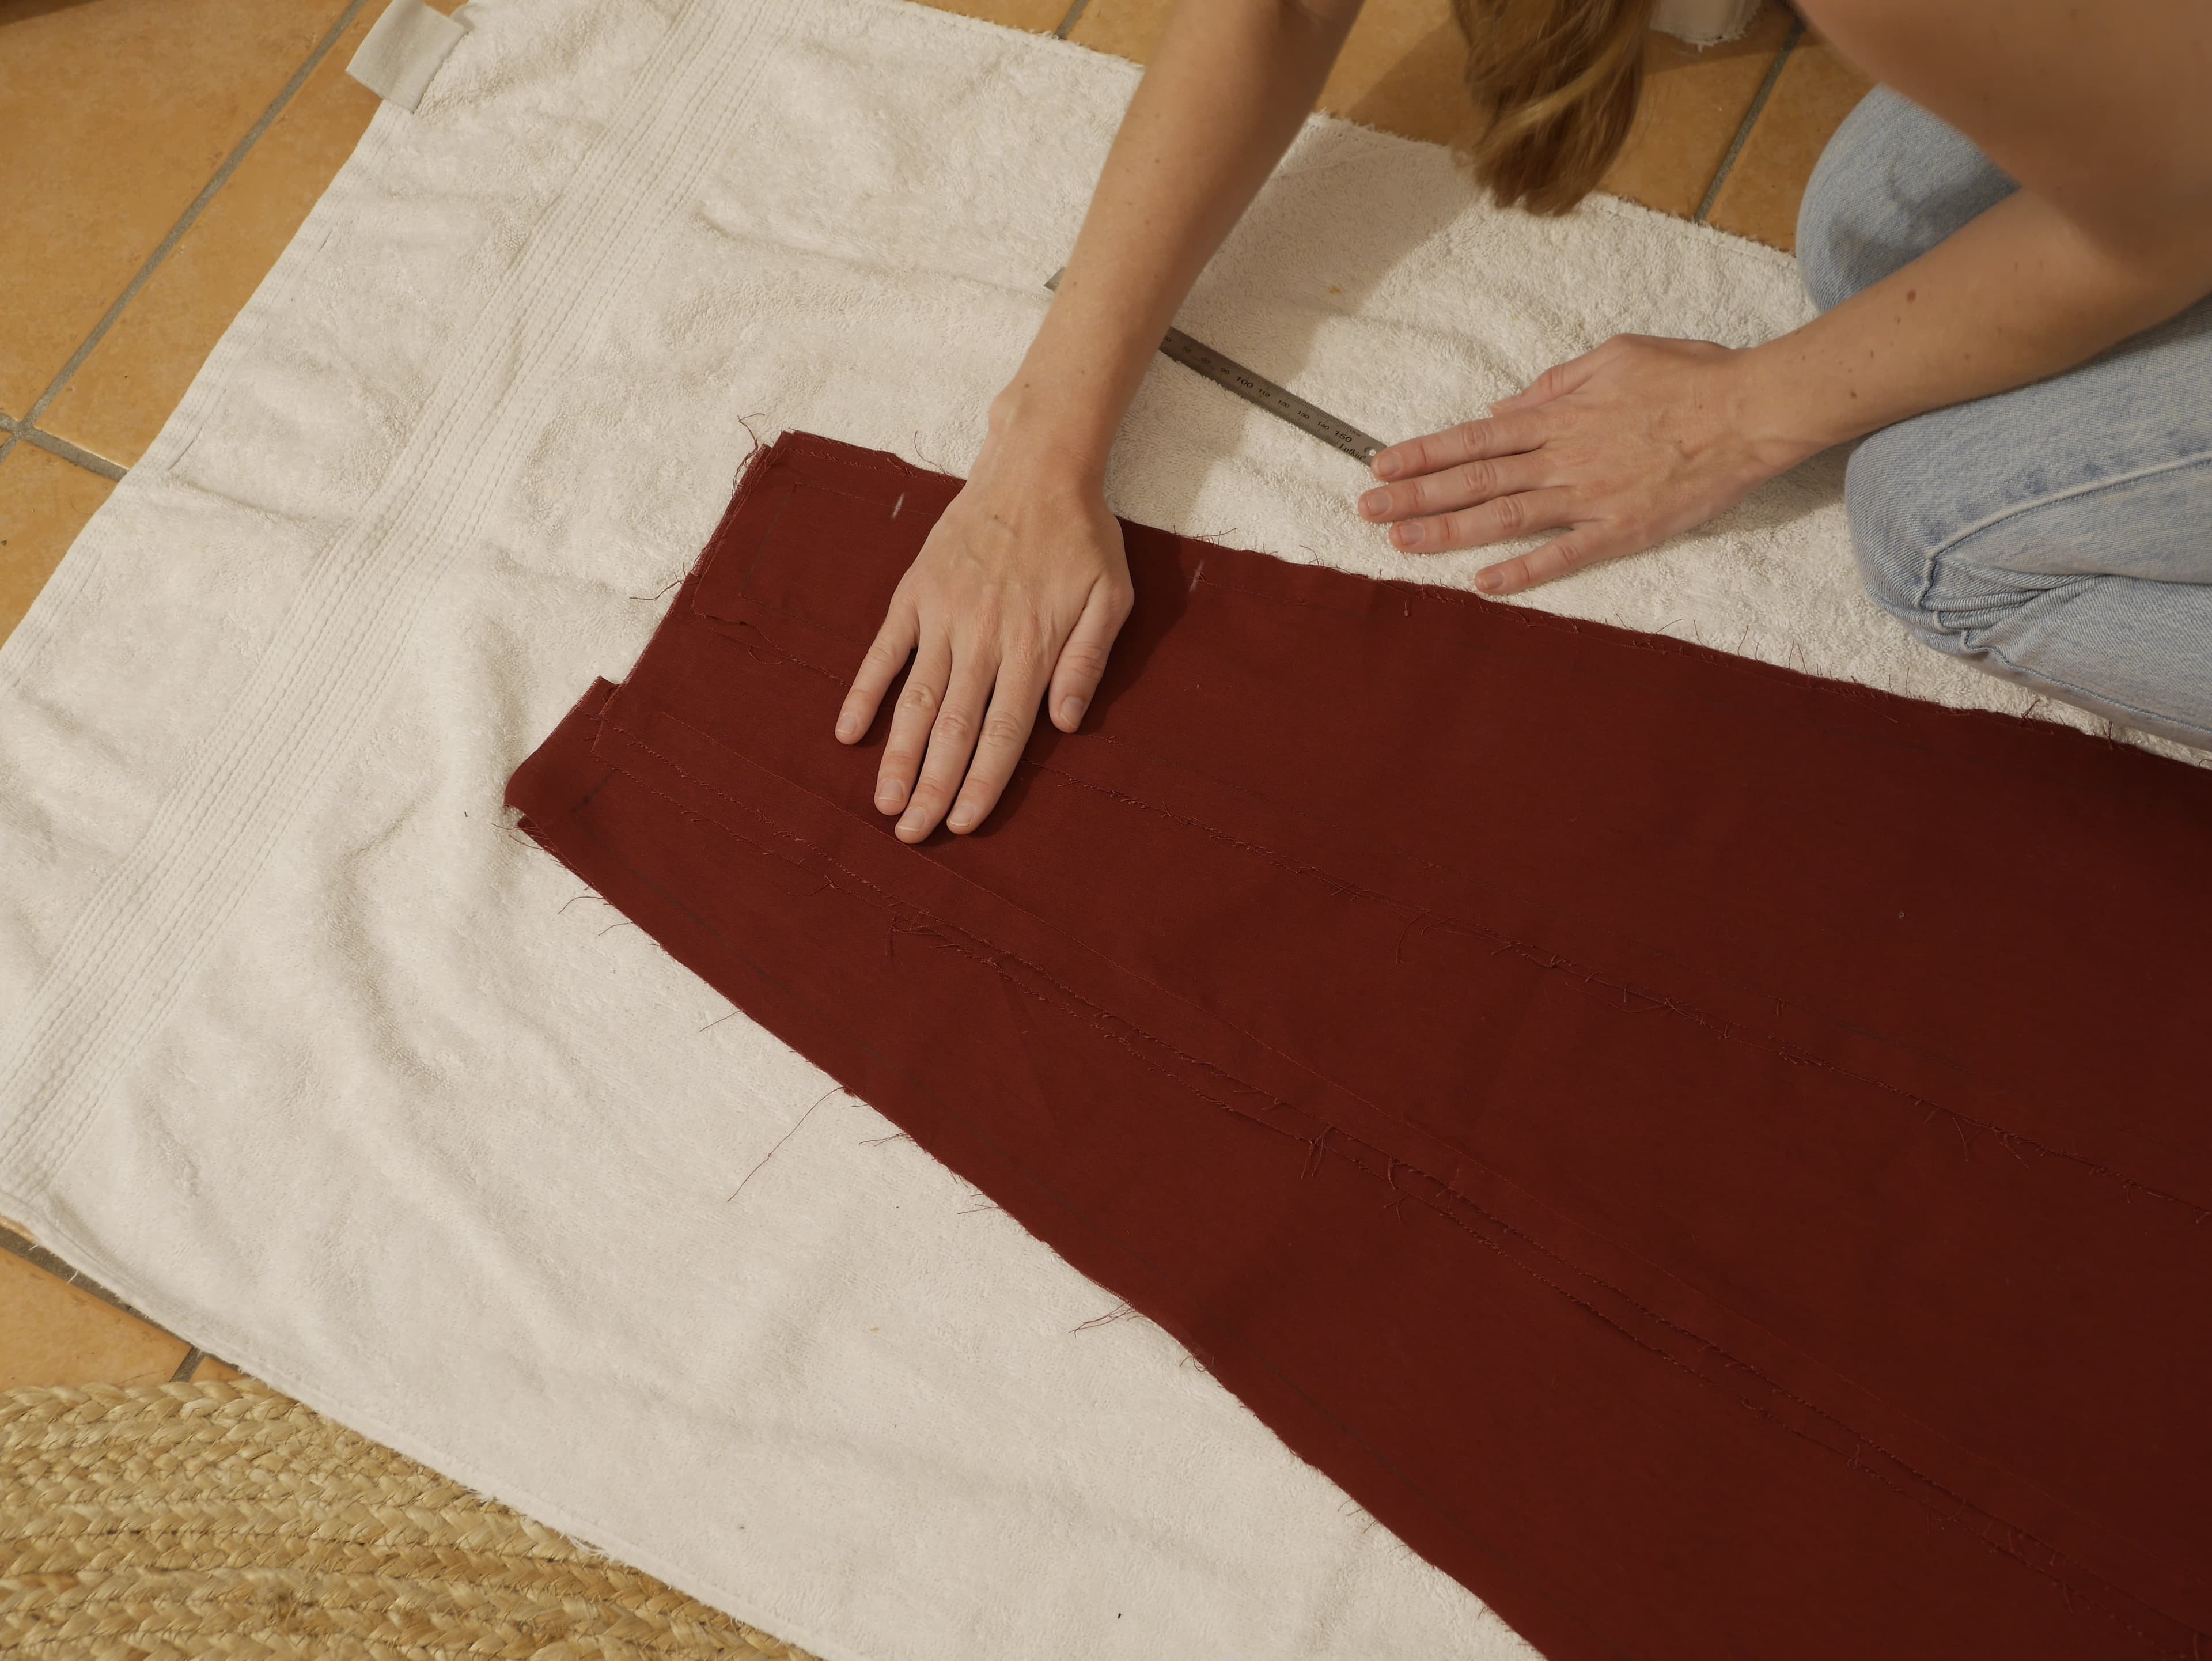
One can make sure the hand fits between the two chalk marks. Notice this picture was taken when I hadn’t turned the pockets out - don’t do this, make sure the pockets are turned out!
Pinning and sewing the panels to form complete pockets
It was now time to pin together the length of the panels on the side of the pocket. I just needed to remember not to sew inbetween the chalk marks - I didn’t want to sew my pocket closed. To remind myself, I didn’t pin between the chalk marks. Once I had backstitched the two sets of three panels with their pocket together, I sewed close the body of the pocket. Again, I pinned along the pencil marks and backstitched. Next I added a pocket to the other two sets of three panels! After doing so, I had two sets of 6 panels each with a pocket sewn in.
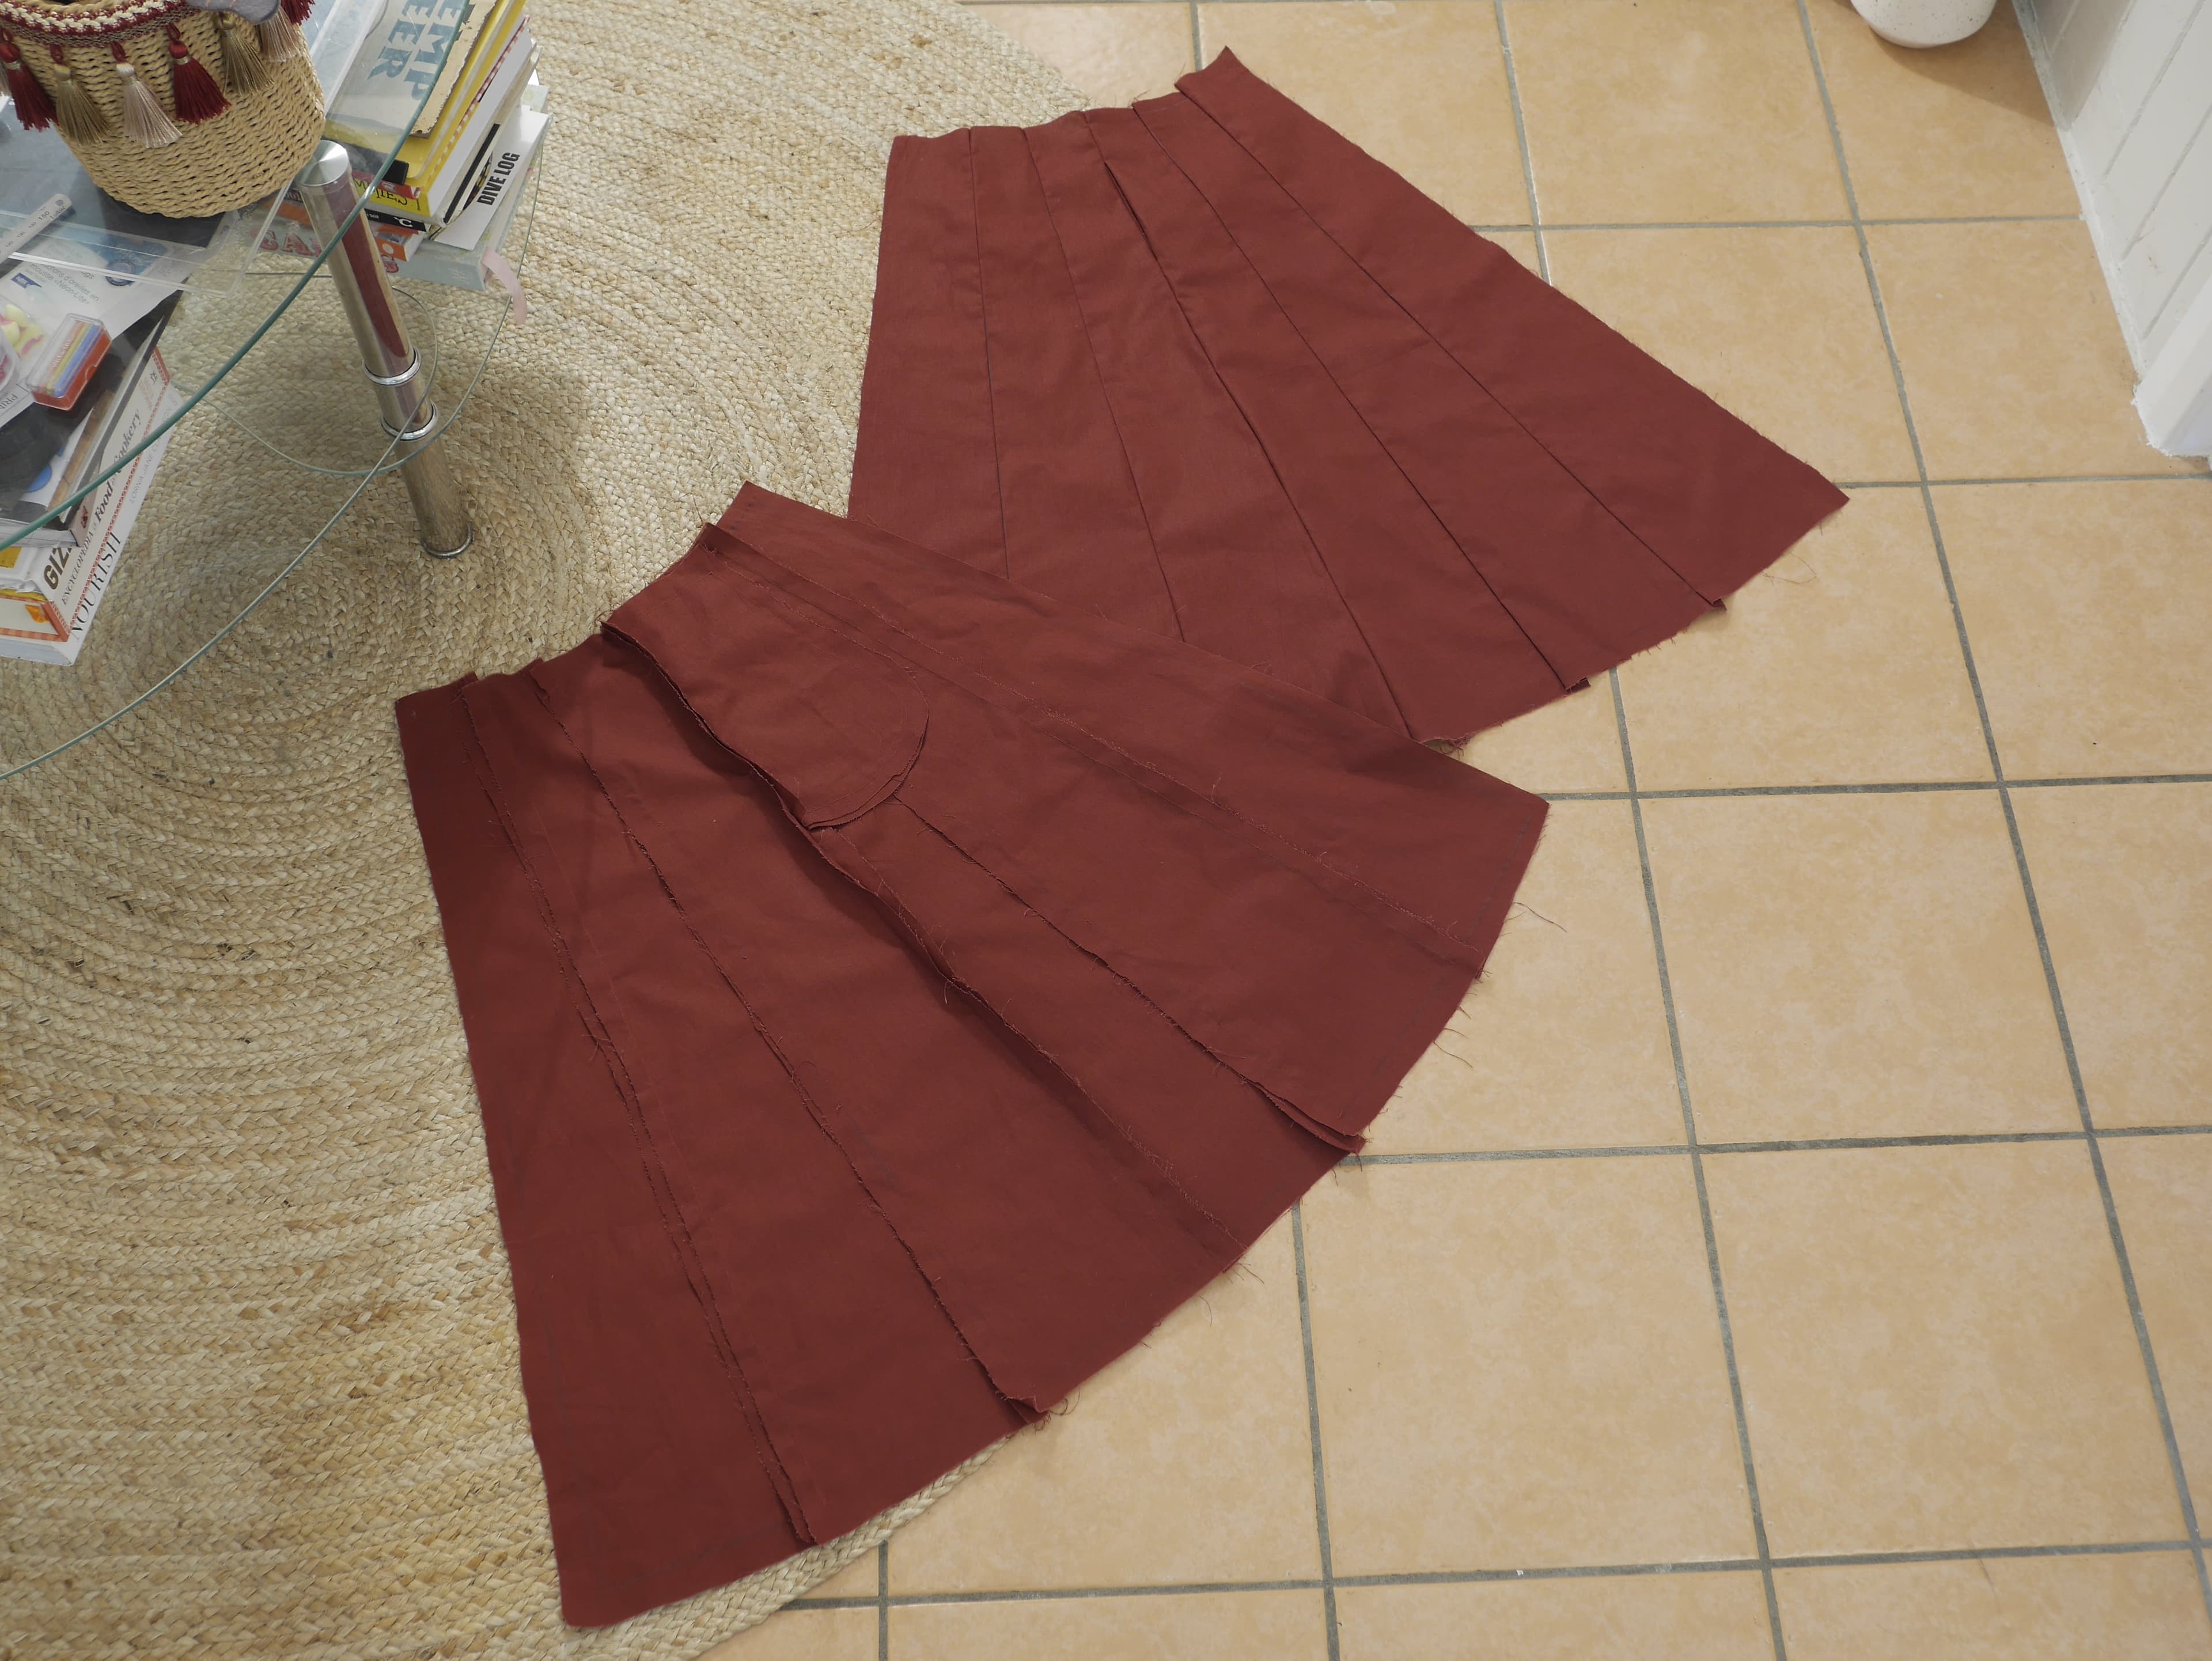
Here are the two large halves of the skirt with their pockets sewn in. One is facing right side up and the other is right side facing down to show the pocket on the inside.
At some point around now, I realised the value of a thimble...
Creating the front split
Finally it was time to connect these two halves of the skirt. At the front there was to be a split and at the back a zip. I began with the front split, but I am not sure if this was the best order as the zip was tricky to place when the rest of the skirt was already in a loop.
I faced the right sides of the two halves together. The green template skirt had a split that went up roughly 28cm from the bottom of the hem. So, with chalk, I marked a line at this point on the side I am sewing together (the front of the skirt).
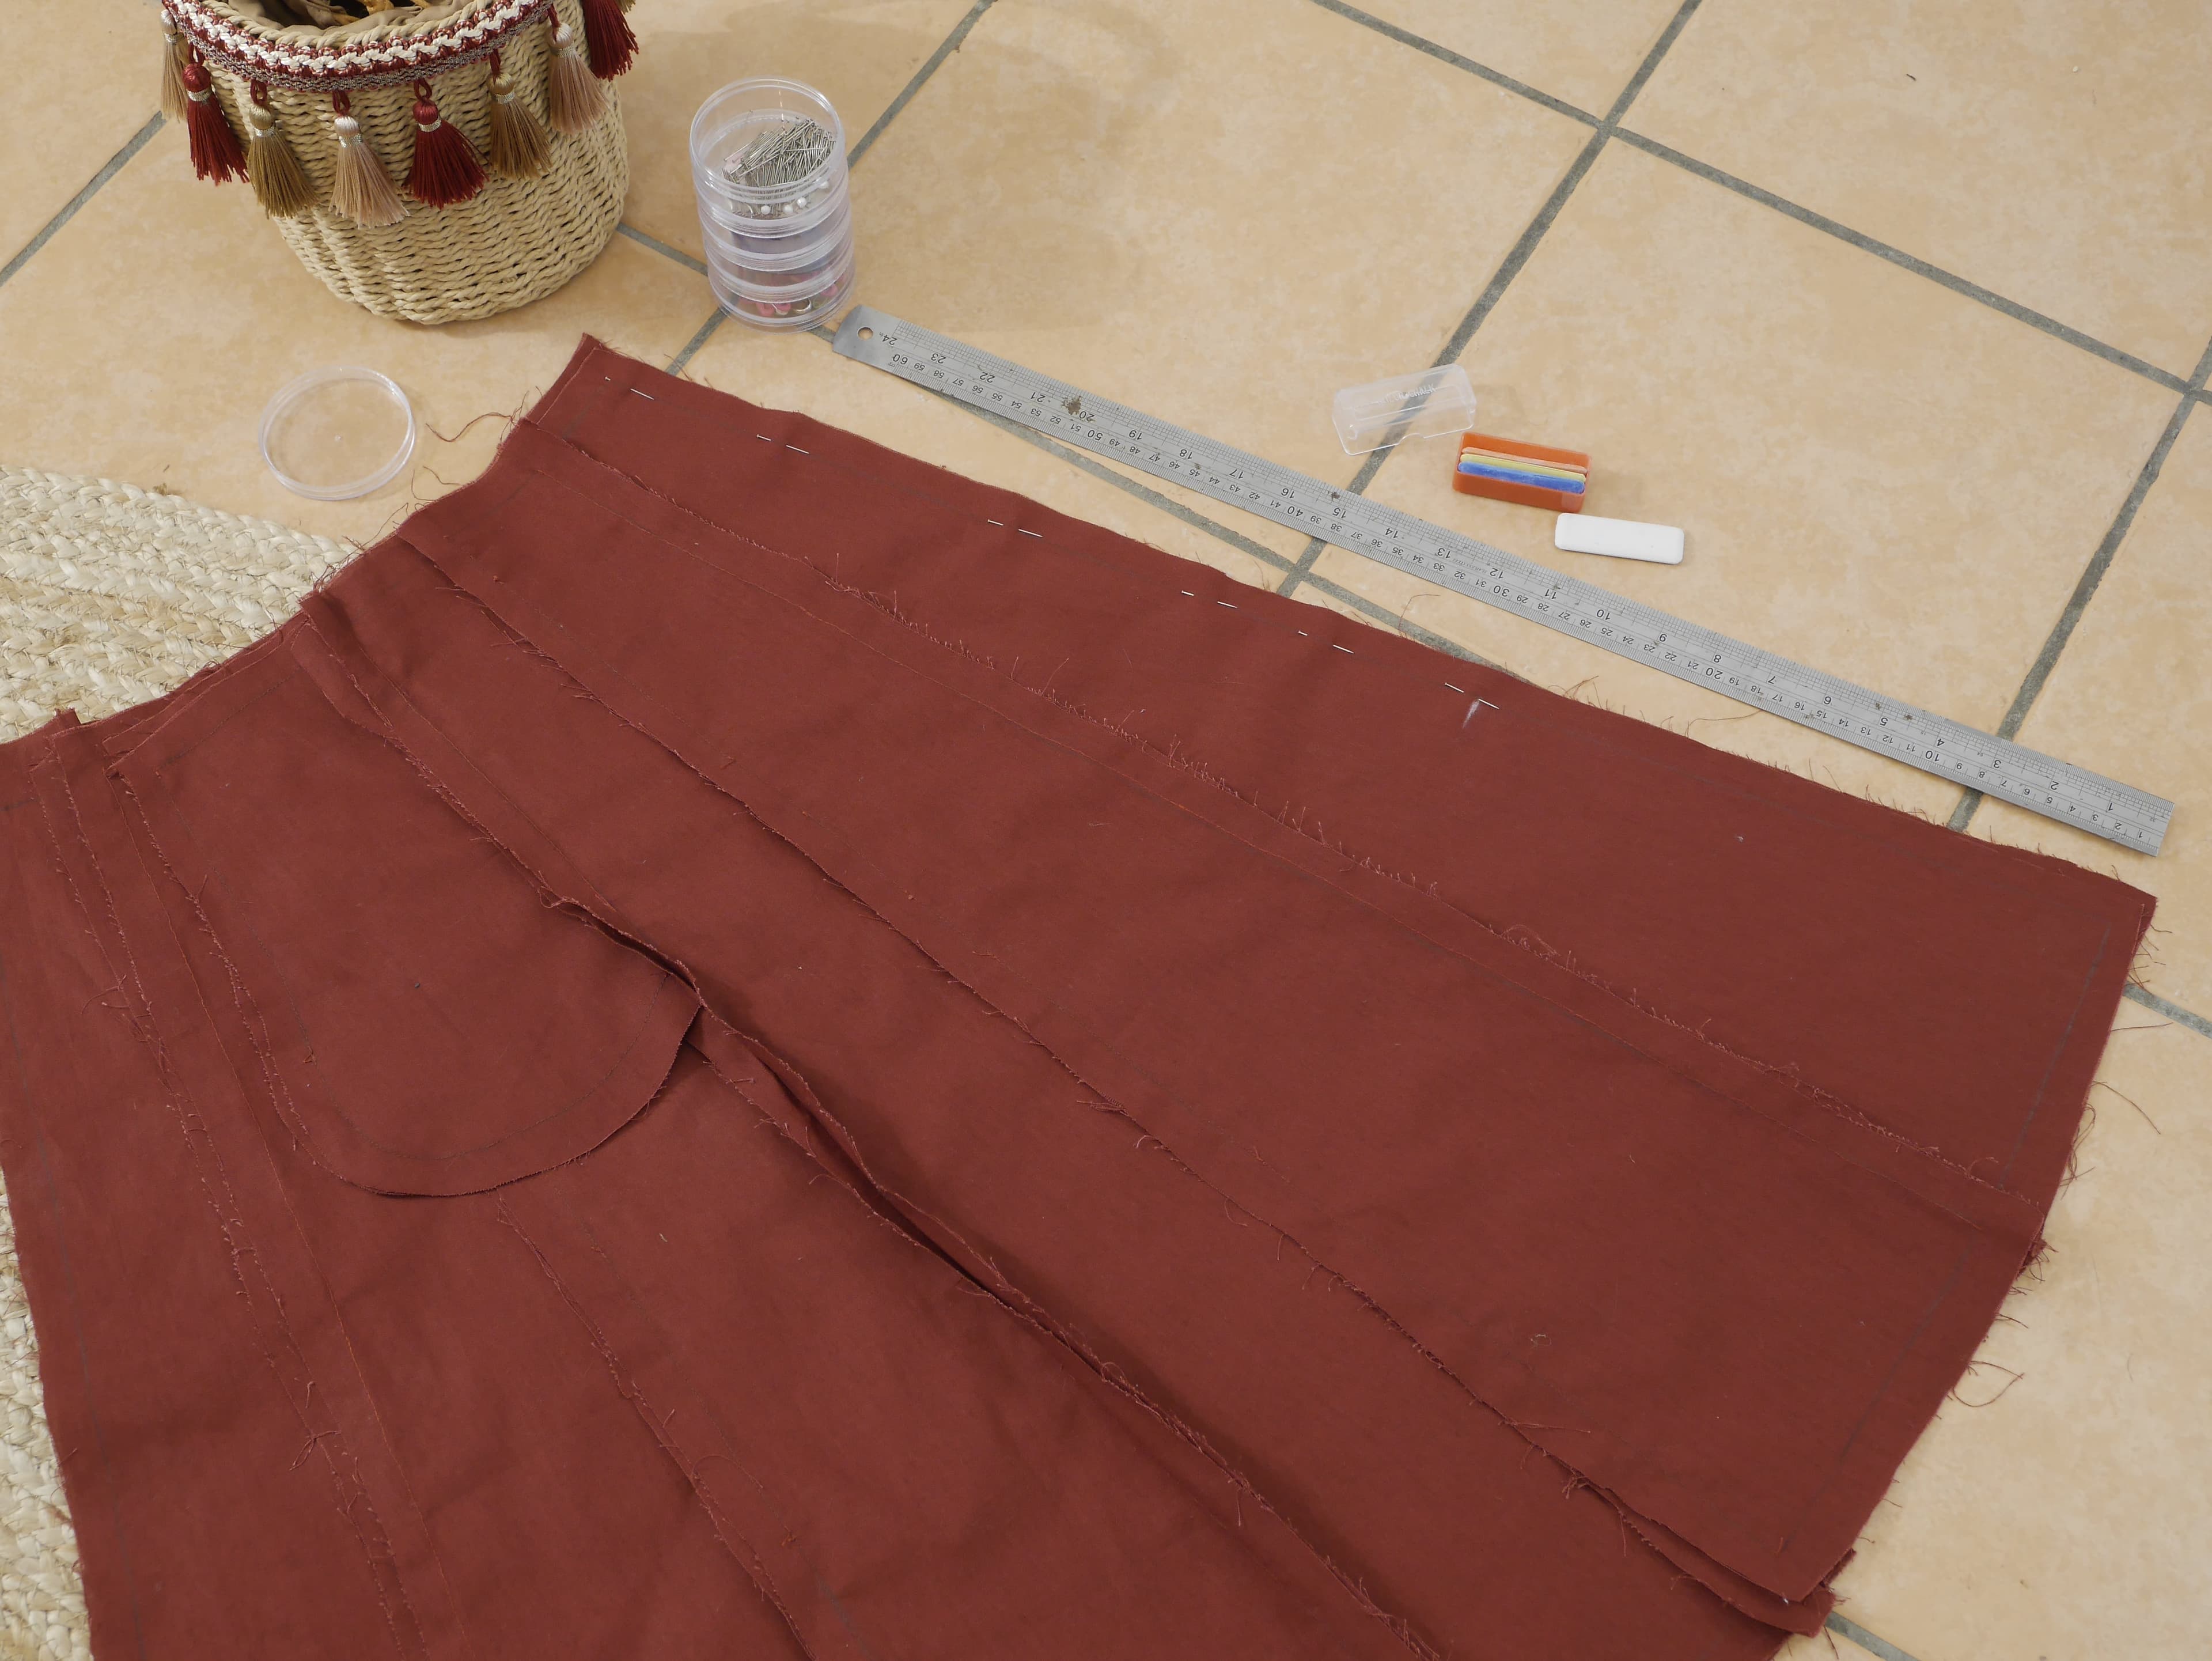
I measured 28cm from the bottom of the skirt and marked a line with chalk. This will be where the split in the front of the skirt comes up to and where I won’t stitch together.
After pinning and backstitching the front of the skirt, I did some sort of stitch at the top of the split to try and strengthen it a bit.
After the front seam/split, the rest of the skirt was sewn in this order: back seam/zip, felling of the seams then attachment of the waistband. I don’t know if there is an optimal order to do these steps. I wonder if the skirt I was using as a template was actually put together in a different order, such as: waistband, back seam/zip, front seam/split then felling of seams. For example, the waistband on the green template skirt was in two pieces, sewn together at the front and I am not sure if this was done for aesthetic purposes or for ease of assembling.
Adding a zip
Next, I closed my skirt with the zip. I don’t have a great way to describe this step, because, boy, did I have trouble turning this skirt around and flipping it inside out a million times to find the best way to pin the zip on. I realised at one point the skirt I was trying to copy actually had an ”invisible zip“ (I originally thought the “invisible“ part was just in the way it was sewn in). I couldn’t find a cotton invisible zip in the stores around me, so I just left mine the way it was. After pinning the zip on I used a backstitch to sew it in place. A backstitch was also used to sew together the remaining length of the back seam.

Struggle-town. That’s all I have to say.
Felling seam allowances
It was now time to neaten up the vertical seam allowances of the panels and the seam allowances of the pockets, which were first ironed flat to make it easier. The seam allowances inline with the back zip, inline with the front zip and those inline with the pockets had each side felled down seperately. On all the others I felled the two seam allowances together.
To do this, I trimmed down one of each pair of seam allowances in half, folded the longer seam allowance over the shorter one and then down onto the main fabric panel. The side that was cut shorter was chosen so that the felled seams fold over to hide the underside of the backstitch (the not-so-pretty side). I pinned it all down first and then whip stitched it in place (I sometimes see this stitch called a fell stitch and a whip stitch being something else). I didn’t fell the top of the pocket as this will be stitched into the waistband.

I know some more experienced sewers will prefer to baste instead of pinning, but I was a bit lazy.
It was so satisfying to see the previously frayed seam allowances all felled down neatly.
Adding gathers
At the time of attaching the waistband, I discovered that the circumferance of my skirt at the waist had increased...! Instead of unpicking any seams and reducing the waist by cutting fabric, I thought I could add some pleats or gathers at the back, on either side of the zip, to reduce the fabric down to my correct size. My decision was to gather it - it looked easier.
To do this, I made two running stitches, double-threaded (I was skeptical my skirt wouldn’t just fall apart when I was done!) that ran across two panels on either side of the zip. By pulling the threads at the ends and sliding the material along, I could bunch the material up into little gathers.
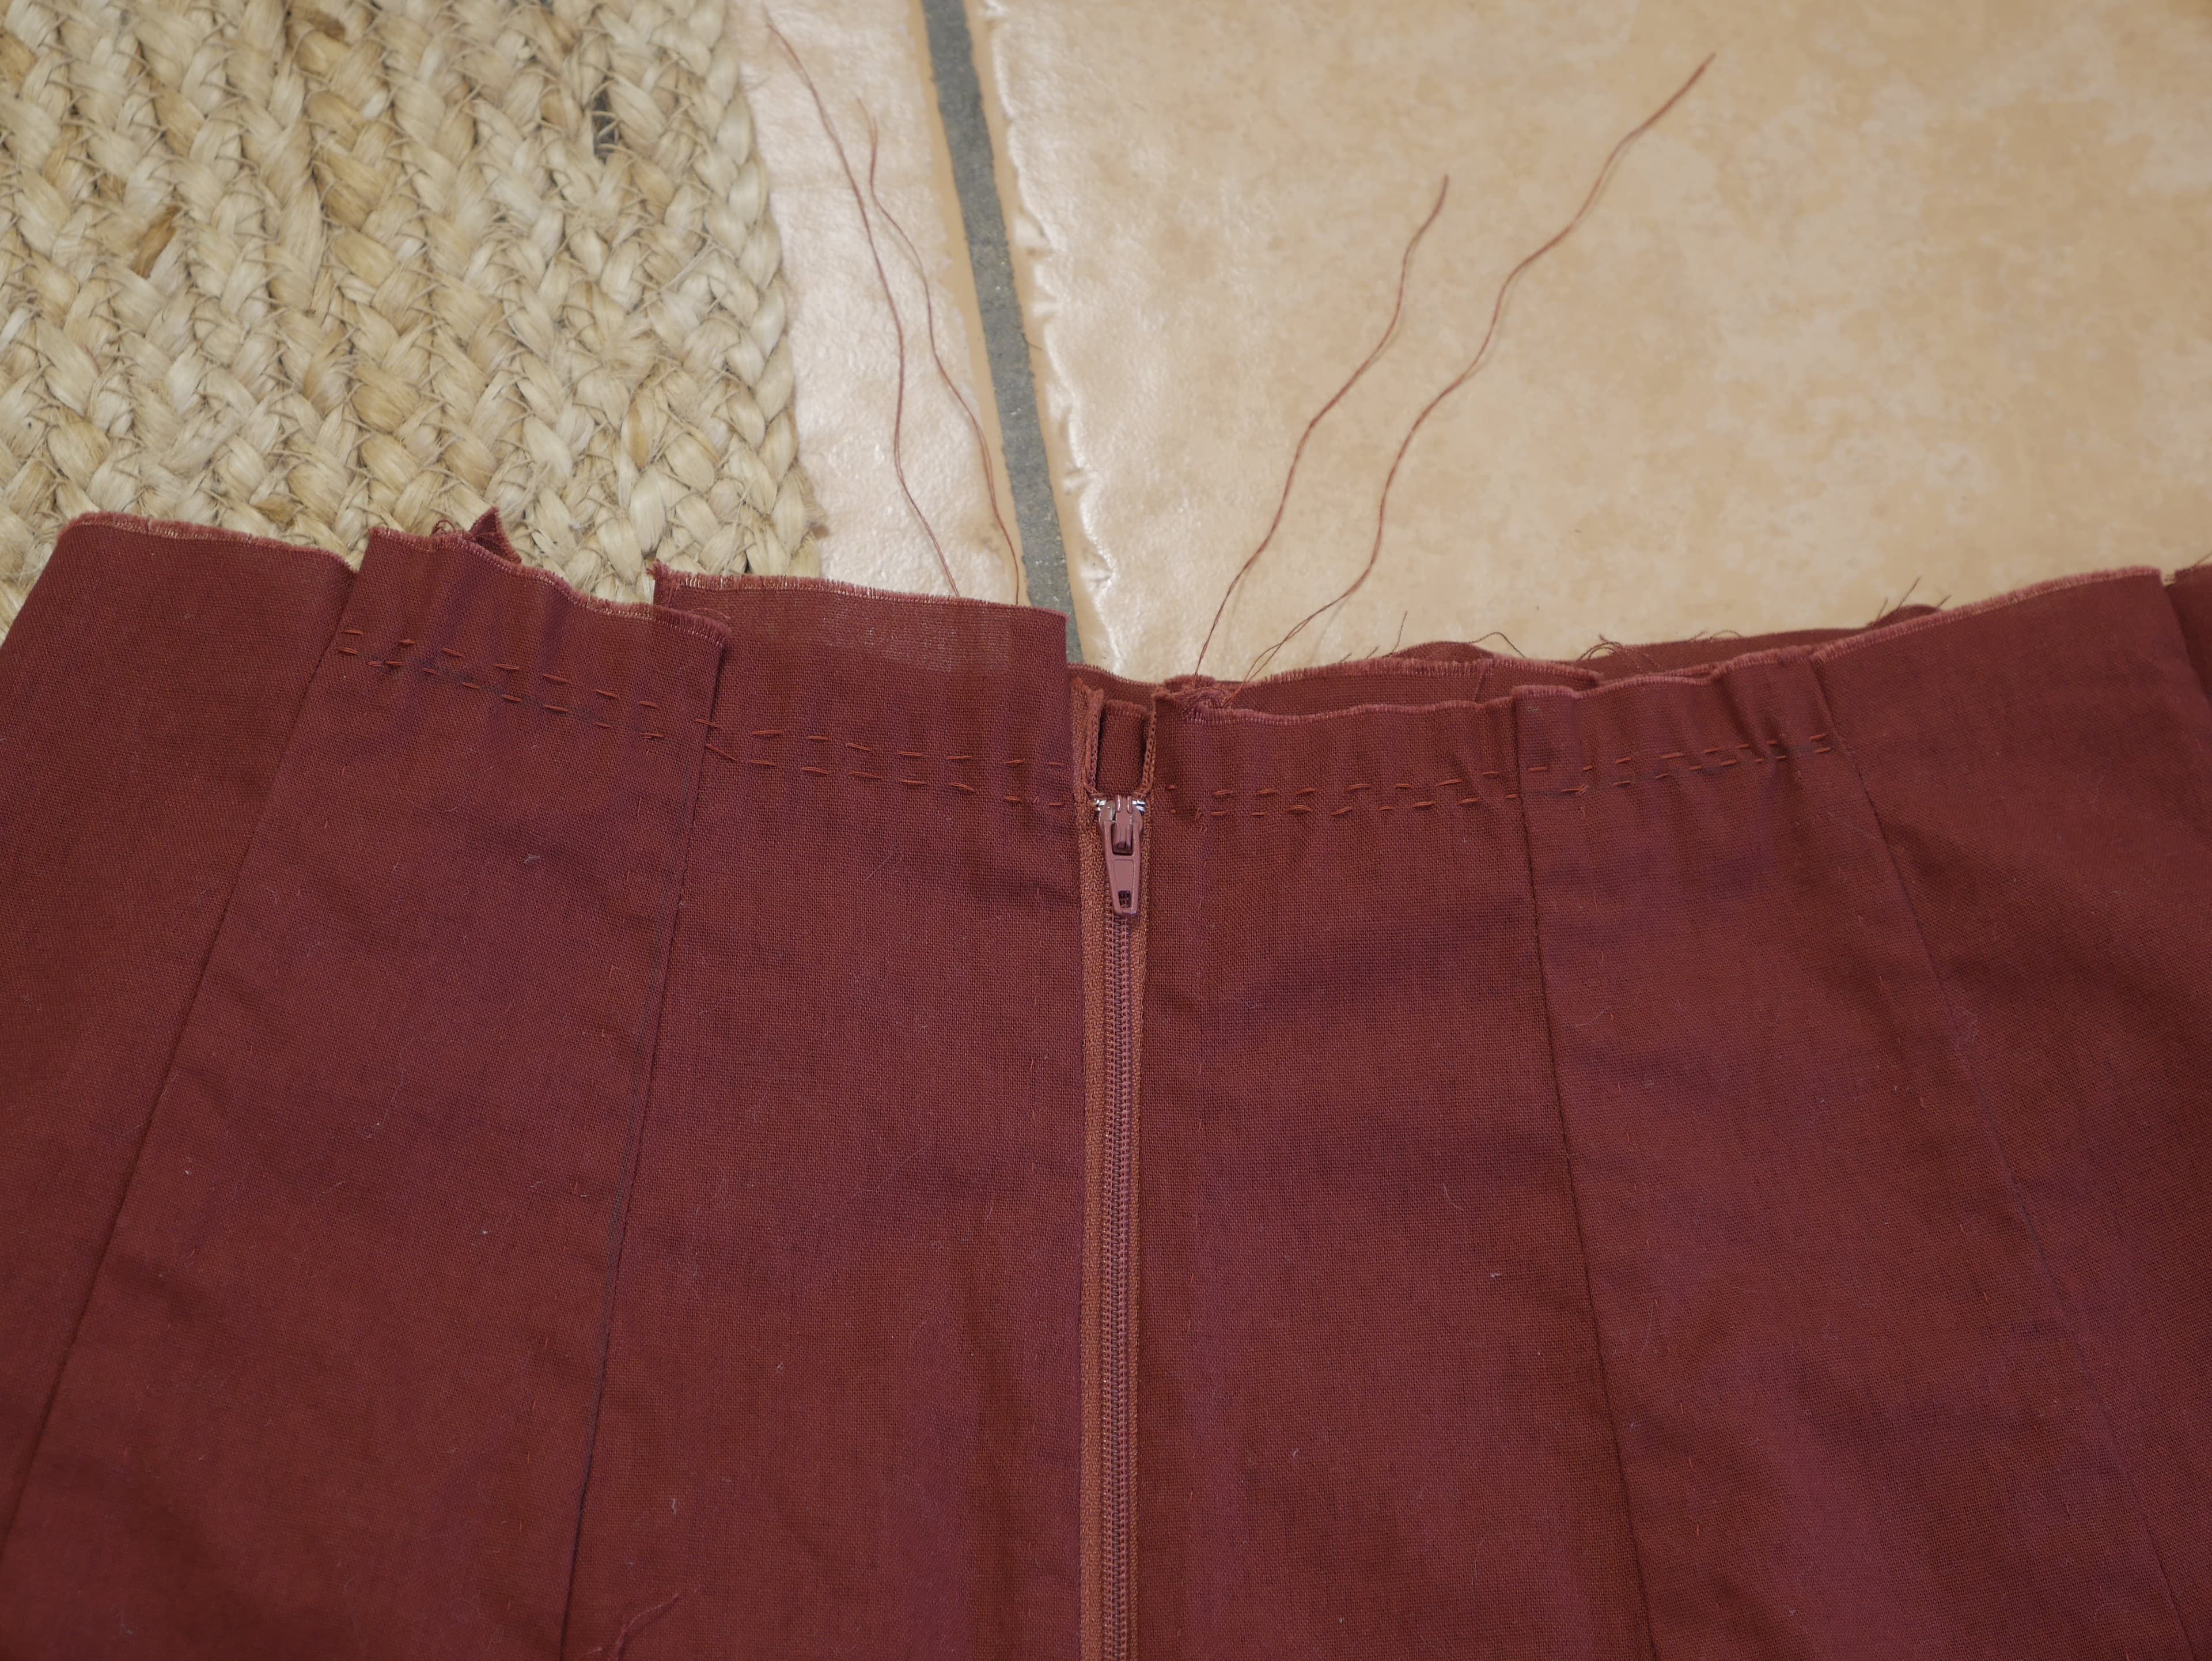
Running stitches at the back of the skirt allowed me to gather the material.

Holding onto the ends of the running stitch threads and gently pushing the material along allowed me to form a gather.
Adding a waistband with a closure
At this point the back of the skirt was beginning to do my head in a bit, because yet again, something didn’t go quite right. I realised that I should have perhaps attached the waistband before doing the zip. My green template skirt has a zip that goes right up to the top of the waistband, but since I had sewn in my zip before the waistband, my zip finished under the waistband. The waistband now needed a new way to fasten together, so I decided to extend its length and add a little flap with a few hook and eye clasps.
I had stopped to remind myself that if I wasn’t making mistakes, I wasn’t learning anything.
To prepare the waistband with its flap, I folded the waistband in half lengthways so right sides are facing together. Then, by holding the material around my waist, the point that sat at my front center was marked with chalk (this point wasn’t in the direct middle of the material because there is extra length on one side for the flap) as well as the point where the flap would start. At the flap end, I backstitched in the shape of an “L” following the pencil lines and stopping at the chalk mark. At the other end, I backstitched in a straighline so the waistband was closed off.

Chalk marks indicate the point that lines up with the center of my front (my belly button) and where the flap starts. The ends were then backstitched, the flap end in an “L” shape and the other in a straight line.
The wasitband was then turned the right way out and placed so it was facing the right side of the top of the skirt. I pinned it and then was careful to only backstitch the side of the waistband that was closest to the skirt.

The inside half (which will become outside) of the folded waistband was pinned to the skirt with right sides facing.
The waistband was folded upwards into its correct position and then the inside of the waistband was turned under, ensuring to cover the stitching and seam allowances on the inside of the skirt. I used a slipstitch to keep it in place.

I turned the seam allowance under and slip stitched the inside of the waistband down.
The hooks and eyes could finally be attached so that the flap closed securely.

Waistband hook and eye clasps.
UPDATE, 2022: Fixing the closure of the skirt
I was not happy with how the zip, the gathers and the closer of the skirt both looked and functioned so, with some reluctance, I decided to unpick the back seam, zip and waistband closure and make some changes.
This was my chance to remove the gathers and cut the two panels on either side of the zip to make them narrower and the waist smaller.
The zip was replaced with an invisible zip which ran all the way to the top of the waistband, removing the need for the waistband flap. The zip was sewn in just like the I made.
For anyone hesitating to unpick their sewing to make a nesessary change: do it, it is probably worth it. I am so happy with the changes I made to my skirt - I am actually excited to wear it around now!
Attaching a facing to the underside of the hem
After sewing in the waistband, the skirt almost looked complete. The last things I had to do were to finish off the hem facing with those 6 smaller “rectangle” shapes of fabric and attach some pretty buttons down the front.
So, it turned out that the hem facing pieces, that are the width of two skirt panels, of course, were not rectangles, because the skirt panels have a gradual slope. To correct the facings I used my paper panel template to trace the slope of the panels onto these rectangles and re-trimmed the seam allowance. Each piece looked like a trapezoid at this point.

We’re slipping back in time here because I actually recut the hem facing for the first time before I closed the skirt up. However, I had to recut them AGAIN once I finally got to sewing them on...
The purpose of the hem facing, I think, is similar to the purpose of hem facings in historical womens’ skirts, that is, to finish the raw hems, give the garment structure and support and perhaps reduce wearing of the hem.
After recutting the hem facings the first time, I discovered their shape was still incorrect, sigh! If one was to lay two skirt panels side-by-side with their long sides touching, the bottom wouldn’t be a straight line due to their sloping sides. So I recut the trapezoids so that they match the shape of two skirt panels together (a slight ’v’ shape on the bottom edge).

This guy thought he needed to intervene when the second round of re-trimming began...
Before sewing them onto the skirt, each piece of hem facing was sewn together, with a backstitch, along their short sides to form a chain.

The trapezoid hem facings were actually sewn together before I realised they were still the wrong shape...! But the idea remained the same when I finally got the hem facings the correct shape.
With the facings sewn in a chain, they were pinned at the bottom edge of the skirt with right sides facing. The end of the chain started on one side of the front split and wrapped around to finish on the other side of the front split.

Hem facings were pinned onto skirt, right sides facing. They still look like trapezoids, even rectangles, but their bottom edge ever so slightly resembles a ”v“ shape.
After backstitching the bottom edge together, the hem facings were turned under so that they lay on the inside of the skirt. Turning the whole skirt inside out, I ironed the facings down, turned their upper seam allownances under and whip/fell stitched them into place. At this point the only parts not sewn up were the side seams along the open split. To close these, I used an invisible stitch/ladder stitch.

Hem facings on the underside of the skirt.
Adding buttons
I was so excited to put the final touches on the skirt - 25 10mm buttons down the front of the skirt, finishing at the top of the split. However, the buttons haven’t arrived yet, so I will update this post when they are all sewn on!
Here’s the finished skirt, minus the buttons. 😊


UPDATE, 2nd November 2021: I didn’t have to wait too long for the buttons to arrive. They were perfect - dark copper coloured metal buttons with a slight “rope” texture around their circumference. I think they really tied the whole skirt together.


References
1
Pensupa, N., Leu, S.-Y., Hu, Y., Du, C., Liu, H., Jing, H., … Lin, C. S. K. (2017). Recent Trends in Sustainable Textile Waste Recycling Methods: Current Situation and Future Prospects. Topics in Current Chemistry, 375(5). doi:10.1007/s41061-017-0165-0
2
US EPA. (2020). Advancing Sustainable Materials Management: 2018 Fact Sheet. Assessing Trends in Materials Generation and Management in the United States. https://www.epa.gov/facts-and-figures-about-materials-waste-and-recycling/advancing-sustainable-materials-management
